Tuesday, July 13, 2010

Scanography edge effects


July 13, 2010,  Rexburg, Idaho, 1:20 AM, HP Scanner


I used this edge effect on both my 8x10 and 4x6 prints.  I deleted the contents and used white as the color, then used the history brush to paint it back.  I scanned a necklace of mine in a dark room to get good color, and then I used a Pseudo HDR action in Photoshop.

Scanography - Collage

Here is the final blend of all of my images:
And here are the images it took to get the final blend.

July 13, 2010,  Rexburg, Idaho, 12:52 AM, HP Scanner


July 13, 2010,  Rexburg, Idaho, 1:01 AM, HP Scanner


July 13, 2010,  Rexburg, Idaho, 12:55 AM, HP Scanner


I took the pens and used them as my background, then I used the quick select tool and selected each of the objects and moved them into the picture with the pens.  I flipped the pens to be horizontal, and then I used the typing mask tool to write school because all of these things remind me of school.

Scanography - One shot

Pennies - July 12, 2010,  Rexburg, Idaho, 10:58 PM, HP Scanner


I thought it would look cool to arrange pennies on top of my scanner.  However, I ran out of pennies so I cropped the photo.  This one was more of a fun one for me, I liked the way it turned out!

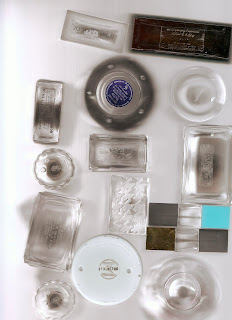
Perfume - July 13, 2010,  Rexburg, Idaho, 10:41 PM, HP Scanner


I placed all of my perfume bottles on top of the scanner to see how it would look scanned.   I wish I had thought of it at night when I had done all of my other scans because the light kind of washed out the color on some of the bottles.  But I still think it looks cool.

Tuesday, June 22, 2010

Fine Art Template

I went for simplicity on my fine art template.  I chose a white background with a simple font.  It's called Champagne & Limousines and I downloaded it on dafont.com.  
Here is the template on it's own:

Then I added a picture of a rose that I took this weekend:
June 19th 2010, 4:47 PM, F/3.2, 1/100, Logan, Utah, Canon Powershot SD 780 IS
This picture is also artsy so I put it in the template also.
April 27th 2009, 7:28 PM, F/4.1, 1/40, Rexburg, Idaho Casio Ex- Z600

Photolusion

 The Wind is Blowing - June 21st 2010, 8:07 PM, F/4.0, 1/160, Rexburg, Idaho, Canon Powershot SD 780 IS


For this picture I posed my friends far apart from each other.   One I had hold out her hand and the other one I had act crazy.  My camera didn't focus as well as I would have liked but I think the picture turned out pretty good.  I made minimal edits, just doing auto tone, color, and contrast and brightening the picture to 29.

Flower Ring -
June 19th 2010, 1:59 PM, F/9, 1/160, Logan, Utah, Canon Powershot SD 780 IS
I took this lovely photo of a rose outside of my friend's brother's house.

Ring-
June 21st 2010, 9:47 PM, F/3.2, 1/160. Rexburg, Idaho, Canon Powershot SD 780 IS
I really liked the way my ring looked and thought it looked like the inside of a flower.  So I took a picture of it.
To start off I tried to match the color of the flower to my ring.  Then I used the quick select tool and dragged the ring over to the flower, and then sized it and placed it in the middle of the flower.  I then played with the settings to make it so it wasn't so bright and it looked like it had a shadow on it.   I toned down the brightness and contrast on just that layer.  Then I flattened the image and used auto tone, contrast, and color.

Wednesday, June 16, 2010

Edge Effects


Brush Effect -
May 7th 2010, 5:56 PM, F/9, 1/250, Layton Utah, Canon Powershot SD 780 IS -
For this photo I converted it to a smart filter and used the Fresco Filter to give it a painted look.  I made the brush size 2, brush detail 8 and texture 1.  I then deleted the photo and brought out the white background color.  I used the history brush tool to bring the picture back.  The thick brush I used was the last brush at 453 pixels.  I went from side to side to get a good brushed on effect on the photo.


Double Fade Border - June 6th 2010, 7:31PM, F/3.2, 1/30, Rexburg, Idaho, Canon Powershot SD 780 IS - I really loved the way this photo turned out so I pretty much just left it the way it us, just using auto tone and contrast to edit the photo.  To get this border I reduced the picture so I didn't have to crop it too much.  I matched the color of one of the bulbs for the canvas extension to add some variety to the background border.  I also chose to go as small as possible in my borders because I did it on another picture and went a little too big and it ended up looking not too great.  This border looks awesome!  


Tuesday, June 15, 2010

Night and Light Effects

Rings -  I took the series of these photos on Tuesday June 8th at 10:37.  I set the shutter speed to 10 seconds and the F Stop was 2.8.  These were all taken in my apartment in Rexburg Idaho and I used my roommate's Canon Powershot A720 IS.  I liked the colors and the way these pictures turned out.  To get these shots I took the glow stick bracelets and arranged them into a pattern like this:


Then I moved the camera in a circle making the circles blur.


Then I moved the camera across the line to get a cool blur.  I love how these turned out!


Sarah - June 8th 2010, 10:26 PM, F/2.8, 15 sec, Rexburg, ID, Canon Powershot A720 IS For this shot I had 3 of my friends move glow sticks while I took I pushed the button on the camera.  My friend wrote out Sarah and then I flipped it in photoshop.  Then I painted some of the background black because the blinds were letting some light in that was a little distracting.


Tuesday, June 8, 2010

Photobook Template


I started off with the template that was provided to us.  I didn't like the brown color that was there originally, so I used the replace color tool to change it to a shade of turquoise that I liked.  I saved the settings and used it to change the other page.  I also didn't like the font that was included in the template, so I downloaded a new font on dafont.com.  I then had some troubles getting the photos to fit in the frame.  I was so frustrated because I couldn't resize the pictures.  One of my friends who is a photoshop genius happened to stop by my office while I was doing this.  It was a miracle!  He showed me a different way to do it.  He said I should first resize them using the free transform tool.  Then with the transform tool to rotate it to the same angle as the frame.   Then he used the polygonal lasso tool to trace the frame.  He then placed the traced shape over the photo and selected the inverse.  Then he went to edit clear to cut the photo out.  Then you move it on top of the frame and voila!  A perfect cut out photo.  I love it!

My Week in Photos


Wednesday - June 2, 2010, 7:52 PM, F/3.2, 1/320, Denver, CO, Canon Powershot SD780 IS

I was driving downtown with my friend and decided to take a picture of these lights in Larimer square.  I used auto tone, color, and contrast, and then I changed the exposure to +1.71 because the photo was underexposed.


Thursday - June 3, 2010, 9:48 PM, F/3.2, 1/10, Englewood, CO, Canon Powershot SD780 IS

I was finished with a fireside and decided it would cool to take a shot of the trees with the light shining through.  To edit it I just used the auto color, tone, and contrast to change the colors a bit.


Friday - June 4, 2010,  9:48 PM, F/3.2, 1/20, Rexburg, Idaho, Canon Powershot SD780 IS

My roommate was eating ice cream with twix and I thought it would be cool to take a picture of it.  I used the macro mode to get the detail in the front and blur the back a bit.  To edit it I changed the levels to the increase contrast 3 in the drop down menu.


Saturday - June 5, 2010, 6:38 PM, F/3.2, 1/10, Rexburg Idaho, Canon Powershot SD780 IS

I took this picture of my necklaces because I thought it looked cool.  To edit it I used  the HDR tool in photoshop and changed the edge glow to 126 px, the strength to 2.75, the exposure to +1.43, and the highlight to -41%.


Sunday - June 6, 2010, 7:25 PM, F/5.8, 1/100, Rexburg, Idaho, Canon Powershot SD780 IS

I took a walk on Sunday night and I saw these cones lined up by my apartment complex.  I thought it would be cool to take a picture of such a bright color against a gray sky.  To edit it I opened the curves and drew an S and then smoothed it out until it looked good.


Monday - June 7, 2010, 10:55 PM, F/3.2, 1/10, Rexburg, Idaho, Canon Powershot SD780 IS

I took a picture of some of the decorations in my apartment.  I played with different angles and this was the best one that I got.  It was underexposed, so I changed the exposure to +2.69.  Then I increased the vibrance to 74.  


Tuesday - June 8, 2010, 10:59 AM, F/9, 1/80, Rexburg, Idaho, Canon Powershot SD780 IS

On my walk to school I saw a tree with gorgeous flowers on it.  I used the macro mode to get some good bokeh.  To edit it I changed the levels to Increase Contrast 3 in the dropdown menu.  


Monday, May 31, 2010

Editing Portraits


Match Color - 
5/31/2010, 12:29 PM, F/5.0, 1/15, Layton, Utah, Canon Powershot SD780 IS
I took a picture that I really liked of my cousin, but I didn't turn on my flash so it was underexposed.  I really liked the color of a picture I took outside of my other cousin, so I opened them both in Photoshop, and used the Match Color tool to replicate the color in the outside picture.  I then increased the Luminance to 114 and the color intensity to 155.


Retouch - 
5/31/2010, 3:47 PM, F/3.2, 1/30, Layton Utah, Canon Powershot SD780 IS
I decided to take a picture of my cousin who had a dirty face after eating a hot dog.  I shot it using the auto feature on my camera.  I used the spot healing brush to do the retouches on the right side of the face.  It did really well covering up the little spots that were there.  On the left side I used the healing brush tool, sampling pixels around the part that I wanted to fix.  It took awhile to finally get it right.  I didn't make any other edits than retouching so the retouches would be easier to see.


Replace Color -
5/31/2010, 4:17 PM, F/5.8, 1/160, Layton Utah, Canon Powershot SD780 IS
I took this picture of my cousin on the swing using the auto feature on my camera.  I like the shovel she was holding, but I wished it matched.  Well good thing I know how to change the color!  I selected it using the quick select tool, then I went into the color replace tool and put the fuzziness at the highest level, and then changed it to a pink that matched her shirt.  Perfect!


Portraits


Little C -
5/31/2010, 2:43 PM, F/4.0, 1/500, Layton Utah, Canon Powershot SD780 IS
For this shot I went outside while my cousins were playing.  My cousin bet that I couldn't take a picture of him while he was running.  He stopped and looked at the camera and I snapped this portrait of him.  When I edited it, I cropped the photo, then used auto color, auto tone, and auto contrast.  I then changed the vibrancy to 78 to get the rosy color on his cheeks to show up more in the photo.


Hats -
5/31/2010, 3:46 PM, F/4.0, 1/30, Layton Utah, Canon Powershot SD780 IS
My cousins were playing fireman and I asked them to pose for a photo and this is what I got.  I used auto tone, color, and contrast at first.  Then I messed around with the HDR settings in Photoshop.  I used the Edge Glow with a  radius of 138 px, and a strength of 3.25.  Then I messed with the tone and detail settings.  I changed the exposure to -1.09, the detail to +44, the shadow to +74.  Then I changed the color to +50 and the saturation to +20. 

 
Group Portrait -
5/31/2010, 2:49 PM, F/4.0, 1/125, Layton Utah, Canon Powershot SD780 IS
This was a hard shot to get.  Trying to get two three year olds and a six year old to smile and look at the camera at the same time is not an easy task.  I didn't center the picture well when I took it, so I cropped it and used auto tone, auto contrast, and auto color.  Then I changed the vibrancy to 80.


Environmental Portrait - 
5/31/2010, 4:17 PM, F/5.8, 1/160, Layton, Utah, Canon Powershot SD780 IS
My cousin was swinging out on the swing so I thought this would be a perfect time to get my enviornmental shot.  I opened it and used the auto contrast, color, and tone.  Then I changed the vibrancy to 60.  Then I converted it to a smart layer to use different filters on it.  I chose Diffuse Glow - Graininess 6, Glow amount 6, Clear Amount 15.


Tuesday, May 25, 2010

High Dynamic Range


I took this photo right outside of the abandoned Mill.  The photo is made of three photos with -2 exposure, 0 exposure and +2 exposure. I put it into Dynamic Photo and merged the images.  Then I  upped the vivid colors to .49, and increased the dramatic light strength to .34.  I added the vignette soft filter on top to create this image

Image 1 - 5/21/2010, 4:45 PM, F/5.6, 1/500, Bannack Montana, Canon Powershot A720 IS


Image 2 - 5/21/2010, 4:45 PM, F/2.8, 1/500, Bannack Montana, Canon Powershot A720 IS

Image 3 - 5/21/2010, 4:45 PM, F/2.8, 1/125, Bannack Montana, Canon Powershot A720 IS

5/21/2010, 2:41 PM, F/4.0 1/1000, Bannack Montana, Canon Powershot A720 IS
For the second photo I took a picture of the trees next to the Hotel Meade.  I put it into Dynamic Photo and increased the color saturation to 1.  I used the Mysterious Light filter on the picture to give it an eerie greenish hue and make it look vintage.